| en |
| visit:89276 | adm | Find | login register |
|
| autism |
| Personal |
| LilyTerm |
| evilvte |
| KDE |
| TW |
| dir |  subject
 | Replies |  | Author | Views | last post |
|---|---|---|---|---|---|---|
| evilvte | build log | 2 | 0/0 | caleb | 10761 | |
| evilvte | evilvte 0.2.7 released
→| 可以了 太感激 因為現在正測試 11.0 alpha3 konsole 是壞的、lilyterm 會躲、原本的 evilvte 又要小心滑鼠絕不能移過去 結果用一個醜醜的 xterm 您可以從 http://download.opensuse.org/repositories/home:/swyear/openSUSE_10.3/ 安裝看看 再次感謝& | 6 | 0/0 | caleb | 24197 | |
| evilvte | evilvte 0.2.9 released
→| I got the BG_TOGGLE_ORDER, thanks! Also request a new hot key, ctrl-N to open new window, and add "copy" " paste" function to right click menu . It's almost | 1 | 0/0 | caleb | 8094 | |
| evilvte | Change background runtime without rebuild
→| Just wanna see my defined background without ctrl . at beginning. So I switch the order.. It's better have an option to select user defined background or desktop background or nothing at | 1 | 0/0 | caleb | 8569 | |
| evilvte | evilvte caleb, I was searching for a super light weight replacement for xterm/konsole/et. al. and I think I've found it. evilvte looks very nice so far in the couple hours I've played with it. | 0/0 | guest | 4027 | ||
| music | youtube video: John Denver ANNIE'S SONG (John Denver) You fill up me senses like a night in a forest Like the mountains in springtime, like a walk in the rain Like a storm in the desert, like a sleepy blue ocean You fill | 0/0 | eliu | 5098 | ||
| TW |  使用 AndCamera 相片編輯器 app 頭部、臉部交換 head swapping 使用 AndCamera 相片編輯器 app 頭部、臉部交換 head swapping點, 點 「手工」,描繪出頭的區域。可以使用「最大放大倍數」把臉的區域放大,方便編輯。按OK會連結多邊形的最後一邊,完成編輯動作 在多邊形選擇的狀態,點「影像印」按鈕,會依上面的區域複製頭部區域的影像成為「影像印」 拉大/縮小「影像印」,調整位置。調整「邊界平滑」的範圍,讓頭看起來自然。範例中的兩個狗頭其中一個是左右翻轉產生。選擇剛才產生的影像印,點複製、貼上,會複製此影像印。按「任何角度」可以 | 0/0 | eliu | 4672 | ||
| TW |  已著色多邊形加上陰影 已著色多邊形加上陰影已著色的多邊形如何加上陰影? 在著色多邊形選著的狀態,點第2層選單→多邊形選擇→複製多邊形選擇 把複製出來的多邊形選擇變成陰影 調整陰影的位置,然後降低陰影的圖層順序,被著色的多邊形覆蓋。不喜歡灰色的陰影,也可以改顏色成其他的顏色,例如藍色。 | 0/0 | eliu | 4120 | ||
| TW |  如何用 AndCamera 影像/相片編輯器 縮小下巴 如何用 AndCamera 影像/相片編輯器 縮小下巴點 調整矩型外框的大小 設定需要的 X/Y 格子數 點 切到編輯控制點 拖曳控制點可改變形狀 嘴唇上的白色屑可以用「影像印」複製正常嘴唇的區域,蓋上去就可以消去。如果要讓眼睛變大,用影像印還是比較容易。 所以蛇精男的大眼睛、尖下巴的效果,AndCamera 的影像編輯器也可以做。用來縮小臉頰、縮小肚子、拉長腿…也可以。 不要笑我為何下巴那麼大,已 | 0/0 | eliu | 3737 | ||
| Storeroom Manage | Welcome to Storeroom Manager forum Please post your suggestions & questions here. | 0/0 | eliu | 4067 | ||
| TW |  彩色照片列印到黑白的雷射印表機
→| 彩色照片列印到黑白的雷射印表機
→|我的 BW print filter 其實是看了 gimp 裏面的 photocopy 影印想出來的。gimp 的 photocopy filter 亮度與原圖差很多,看起來比較粗糙。 | 5 | 1/0 | eliu | 21751 | |
| PV editor |  Add a shadow to a color-filled polygon Add a shadow to a color-filled polygonHow to add a shadow to a color-filled polygon. While the filled polygon is selected, tap the second-level menu→Polygon selection→Copy polygon selection Poly select→shadow/gradient Adju | 0/0 | eliu | 4136 | ||
| PV editor | open jpg editor(photo editor) tap menu button : tap 'New Canvas' Input the width, height and color. You can also use backdrop & tiles. Tap 'A' to add text. Select the color and style. Use 'Image | 0/0 | eliu | 3749 | ||
| PV editor | Use the photo editor to adjust the color AndCamera photo editor can adjust the color of a photo. Cyan: G+BMagenta: R+BYellow: R+G white, grey : R=G=B Under sunshine and bulb, photos are too yellow (R+G too high) a: | 0/0 | eliu | 3641 | ||
| TW |  如何在多邊形選擇區域打洞 如何在多邊形選擇區域打洞多邊形選擇區域的打洞可用在 多邊形(多邊形選擇 + 矩型) 濾鏡 影像印複製 部份影像儲存 製作範例圖中的空心的星星 點 點☆ 拖曳調整大小 點矩型把多邊形填顏色,顏色可以改 點 點☆ 拖曳調整☆大小位置,讓小☆剛好在第一個☆的裡面 在小☆選擇的狀態,點第2層選單的「選擇的多邊形→洞」 濾鏡的洞類似上面的過程,不同的是點「矩型」改成「灰階」濾鏡 要如何讓 | 0/0 | eliu | 3887 | ||
| TW |  android AndCamera 相片編輯器 使用多重濾鏡
→| android AndCamera 相片編輯器 使用多重濾鏡
→|直接點「銳利化」,區域是矩型。大部份的情形是ok,但是背景也銳利化,所以有時會看到一個矩型的增強區域,很奇怪。這時候就可以用像上面用手工描繪出物體的區域。 | 1 | 0/0 | eliu | 16395 | |
| PV editor | 修改橢圓或矩型的線寬 假設已經點出一個橢圓,想改變線寬,點圖示的鉛筆(編輯) 線寬或是填充的顏色都可以改 | 0/0 | eliu | 3731 | ||
| PV editor |  Use AndCamera photo editor to synthesize the background of 'shallow depth of field', black&white, spray
→| Use AndCamera photo editor to synthesize the background of 'shallow depth of field', black&white, spray
→| | 4 | 0/0 | eliu | 17510 | |
| TW | 如何使用 AndCamera 的影像編輯器調整照片顏色
→| 偏藍的照片,-B,+R,+G 偏黃的照片, -R,-G, +B | 1 | 0/0 | eliu | 8179 | |
| PV editor |  Using AndCamera photo editor to rotate text Using AndCamera photo editor to rotate textTap 'A' button to create a text object. While the text object is selected, tap 'Image stamp'. This converts the text object to an image stamp. Now the text image stamp can be rotated. Check 'Any angl | 0/0 | eliu | 3752 | ||
| PV editor |  gradient filling
→| gradient filling
→|The same method can be used to fill a polygon with text/symbols or a photo. AndCamera Google Play | 1 | 0/0 | eliu | 8209 | |
| AndAlarm | AndAlarm Q&A AndAlarm combines calendar And Alarm. It is better and easier to use. Q: The differences between AndAlarm and Android built-in Calendar.A:- Android's built-in cell-based Calendar is more suitable for | 0/0 | eliu | 5535 | ||
| AndAlarm | Welcome to AndAlarm Forum Please post your questions and comments here. | 0/0 | eliu | 4181 | ||
| PV editor |  檔案總覽中看不同的資料夾
→| 檔案總覽中看不同的資料夾
→|最新的 AndCamera 可以選擇更多的資料夾當工作的主資料夾。資料夾路徑來源就是上面的使用者自訂的選單。 目前 Android 6 對 SD 的權限有莫名其妙的限制,導致檔案不能搬移。如果需要資料夾分類,建議拍照時就選擇好資料夾,這樣就解決部份問題。 | 1 | 0/0 | eliu | 8400 | |
| TW |  使用 PV 編輯器 修正桶狀/梯形/X形 變形、移除不想要的物體/人物
→| 使用 PV 編輯器 修正桶狀/梯形/X形 變形、移除不想要的物體/人物
→|同樣的方法,用 1x1 格,可用來修正梯形/桶狀/X型變形。為了簡化起見,只用1x1,右邊中央的凹下去,可用1x2修正。 點 底圖→梯形變形 or 桶狀變形 即可產生全圖的 1x1、1x2 | 1 | 0/0 | eliu | 8258 | |
| AndAlarm | PRIVACY POLICY for Google Play The GPS data are only for personal use and are not transmitted to any remote host. | 0/0 | eliu | 11882 | ||
| PV editor |  Swapping heads with AndCamera photo editor app Swapping heads with AndCamera photo editor appTap, tap 'Handcraft',draw the polygon selection of the head。Use 'Max zoom' to zoom in if necessary。Tap OK to connect the last edge of the polygon and complete the editing. While the polygon is select | 0/0 | eliu | 4339 | ||
| PV editor |  How to cut holes in a polygon selection How to cut holes in a polygon selectionThe holes in a polygon selection can be used for polygon shape(polygon selection + rectangle) filters image stamp copy partial image saving (transparent holes) Creating the hollow star in the exampl | 0/0 | eliu | 3719 | ||
| AndAlarm | Welcome our new member, kuoshelton to AndAlarm Click here if you want to know more about kuoshelton | 0/0 | site admin | 729 | ||
| TW |  PV editor 後製做出淺景深、黑白、噴霧、鉛筆素描背景的效果
→| PV editor 後製做出淺景深、黑白、噴霧、鉛筆素描背景的效果
→|亮度濾鏡是一種使主體明顯且自然的濾鏡。不過邊緣要切很仔細,否則可能有白邊。 | 6 | 0/0 | eliu | 24908 | |
| Storeroom Manage | Storeroom Manager Q&A Q: How to delete/rename a category, type or brand? A: Open the Cat/type/brand list, goto to the category, type or brand you want. Long-click the item. An editing dialog shows up. You c | 0/0 | eliu | 4016 | ||
| TW | 在 Android 如何使用 AndCamera 的照片編輯器 app 修掉/淡化眼袋、色素、黑眼圈、皺紋 在 Android 如何使用 AndCamera 的照片編輯器 修掉/淡化眼袋、色素、黑眼圈、皺紋 點 點「手工」 開始點需要的「點」,框出需要修正的範圍,範圍一般需要比實際的大一些,這樣才可以「邊界平滑」。點不放可以看左上角的放大鏡移動到適當的位置。點OK完成多邊形範圍。 點「模糊」 改變 RGB 來調整顏色,像眼袋…等陰影深色區域,一般是把RGB 增加 就可以淡化顏色 調整 模 | 0/0 | eliu | 3869 | ||
| TW |  在 Android 如何使用 AndCamera 的照片編輯器放大眼睛、加眼睛的反射光芒, enlarge eyes, add eye reflection
→| 在 Android 如何使用 AndCamera 的照片編輯器放大眼睛、加眼睛的反射光芒, enlarge eyes, add eye reflection
→|已經國三了 | 2 | 1/0 | eliu | 10165 | |
| TW | AndCamera 提供的文字式樣  AndCamera Google Play | 1 | 0/0 | eliu | 7907 | |
| AndAlarm | AndAlarm 使用說明
→| 最近老婆開車下班連吃兩張超速罰單,就告訴她用 AndAlarm 設定 by GPS 的鬧鐘。 如果上下班時間某路段有警察設立移動式測速照相、手持超速照相,可以「新增週鬧鐘」,設定開始時間,然後設定 by GPS,當手機進入範圍後就會播放音樂提醒,最多連續搜尋 1 小時。 | 6 | 0/0 | eliu | 27929 | |
| TW |  如何用 Android AndCamera 的相片編輯器畫出傾斜、旋轉的文字
→| 如何用 Android AndCamera 的相片編輯器畫出傾斜、旋轉的文字
→|目前 android <= 5.0 的表情文字有 128 的最大上限。可以用上述文字轉影像印的方式放大。 | 1 | 0/0 | eliu | 8174 | |
| PV editor | 如何用手機拍清晰的近拍、微距攝影
→| 近拍拍很多照片,要如何輕鬆比較&刪除較差、較不清楚的照片?我們可以在「檔案總覽」長按&點選要比較的照片,然後在選單內點「只看選擇的圖」,這樣就可以快速切換要比較的圖,然後刪除(點右上角的半透明垃圾桶)較差的幾張,留下最好的。AndCamera 相片瀏覽器切換照片時可以保持放大倍數,對比較照片的對焦是否清楚很有用。 | 1 | 0/0 | eliu | 7410 | |
| TW |  PV editor 相片編輯器 調整物體的顏色
→| PV editor 相片編輯器 調整物體的顏色
→|用同樣的方式也可以用來調整天空的顏色,讓天空更藍。 AndCamera Google Play | 1 | 0/0 | eliu | 8103 | |
| PV editor |  Use photo editor to adjust the color of an object
→| Use photo editor to adjust the color of an object
→|This method can be used to make the sky bluer. AndCamera Google Play | 1 | 0/0 | eliu | 7608 | |
| PV editor | Andcamera問題
→| 好的,謝謝eliu兄~ | 2 | 0/0 | winlin | 8924 | |
| TW | 文件影像加強—使用對比濾鏡 原文字影像 使用對比濾鏡來增強之後,文字會變成非常深藍的顏色,接近黑色。文字變得更清楚。適合黑白雷射印表機列印 使用銳利化的結果還可以,缺點是有白線。 用了黑白濾鏡,看起來很像傳真機、影印機的影像,效果非常差。 | 0/0 | eliu | 4425 | ||
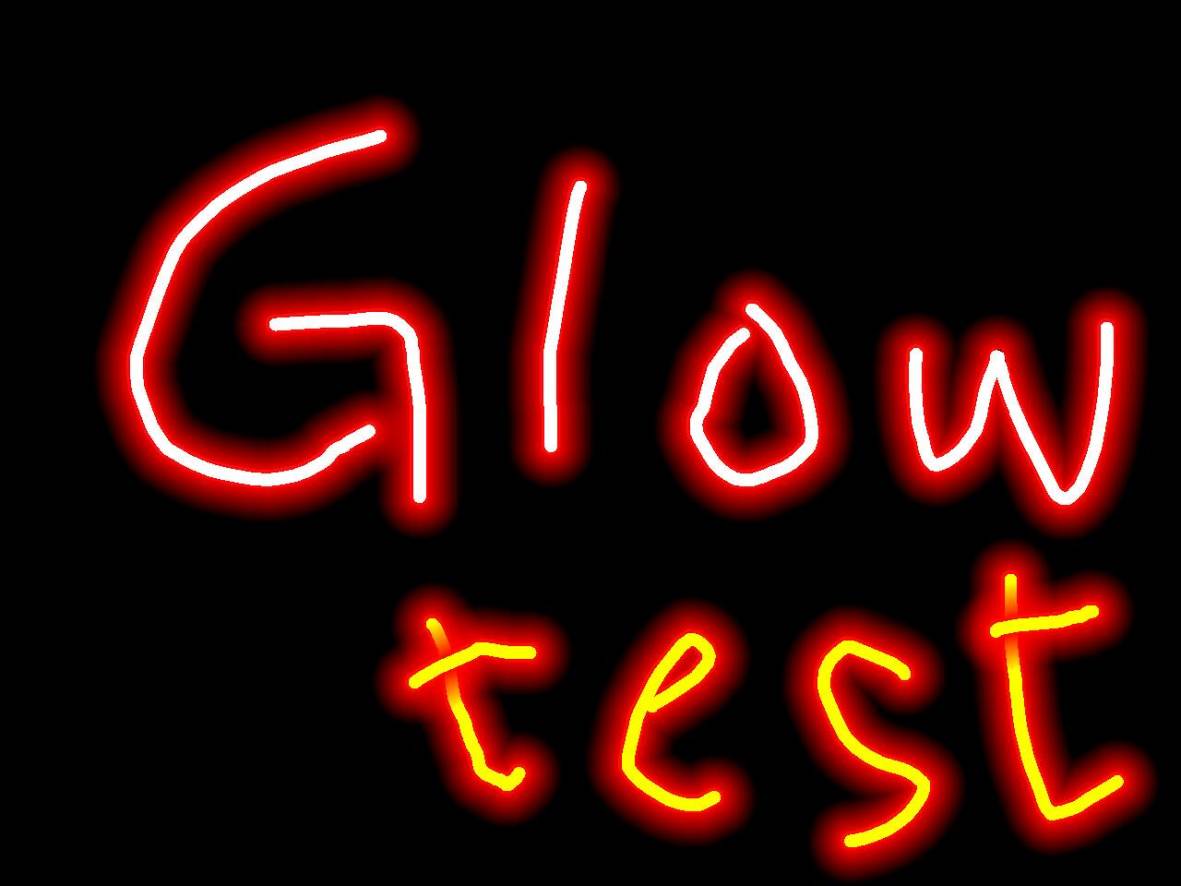
| PV editor |  freehand lines neon glow
→| freehand lines neon glow
→|The outlines of script font have overlappings. The neon glow looks weird. To generate merged outlines, check 'Script font merge' in the dialog of text outline generation. | 3 | 0/0 | eliu | 15181 | |
| TW |  使用漸層著色
→| 使用漸層著色
→|用漸層可以產生有趣的圖案,先產生笑臉的外框。重複上面填入漸層的步驟。 | 2 | 0/0 | eliu | 12938 | |
| . | Welcome our new member, Kanericher to en Click here if you want to know more about Kanericher | 0/0 | site admin | 2314 | ||
| TW |  在 Android 如何使用 AndCamera 的照片編輯器改善日光燈顏色、加腮紅 在 Android 如何使用 AndCamera 的照片編輯器改善日光燈顏色、加腮紅在日光燈下拍照,顏色一般會偏藍、偏綠,照片看起來偏冷,這就是紅色不足。點「調整影像顏色」把紅(R)增加。如果照片出現過亮、顏色偏淡的情形,把藍(B)、綠(G) 減少一點。如果色彩偏淡,也可以用「色彩濃淡」調整。 點, 點 ,調整圓形的大小,符合需要的腮紅區域大小。也可以用★或是編輯其他的任何形狀 點「模糊」,底下的RGB調整,增加紅(R),這樣可以做出紅色的區域,同時使皮膚平滑,減少斑 | 0/0 | eliu | 3805 | ||
| TW |  穿入相片中物體背面的文字 穿入相片中物體背面的文字請先更新到最新的版本才可以正確操作。 點, 點 「手工」,描繪出花的區域。可以使用「最大放大倍數」把花的區域放大,方便編輯。按OK會連結多邊形的最後一邊,完成編輯動作 在多邊形選擇的狀態,點「影像印」按鈕,會依上面的區域複製花的影像成為「影像印」 把影像印搬回原位置,覆蓋原有的花。必要時可以用「數字編輯位置大小」微調。 用[A]按鈕或文字外框製作文字 搬文字到花的後方,用「提昇」提高影像印的Z層 | 0/0 | eliu | 2268 | ||
| TW |  PV editor 手機編輯輸出大頭照/證件照 PV editor 手機編輯輸出大頭照/證件照最近因為要申請證件,需要列印1吋的大頭照。自己買一疊相紙印用印表機划不來。 去照相館沖洗也是不便宜,一般有最低價格的限制。 如果拿去萊爾富的「立可得」印大頭照/證件照,$80/張。但是立可得如果當成一般的生活照印,$6/張。 用最新的 AndCamera 相片編輯器,用手機app 編輯製作複製多張大頭照於一張 .jpg 很簡單。 在最底層選單—大頭照輸出 在製作之前可以先用美白、去斑、 | 0/0 | eliu | 4402 | ||
| AndNote | PRIVACY POLICY for Google Play The photos/videos/audio are not transmited to any remote host. | 0/0 | eliu | 5865 | ||
| TW |  自由手繪線段霓紅燈光輝
→| 自由手繪線段霓紅燈光輝
→|英文書寫體的外框有重疊。加上霓虹光輝看起來有點怪。 如果要產生一體的效果,產生文字外框時勾選「書寫體合併」 | 3 | 0/0 | eliu | 14781 | |
| PV editor |  photo editor: apply multiple filters to one object photo editor: apply multiple filters to one objectHow to apply multiple filters to one polygon selection of an object Tap, tap 'Handcraft',draw the polygon selection of the object。Use 'Max zoom' to zoom in if necessary。Tap OK to connect the last edg | 0/0 | eliu | 5937 | ||
| AndNote | Welcome to AndNote forum Please post your comments/questions/suggestions here. | 0/0 | eliu | 4912 |